Pizza Time! - FD Cannon Unit Guide


The 1.4 FD Laser Cannon Team (that's a mouthful) is a unit that goes back and forth between favorability within the community. As with everything, there are a few die-hard fans who will always bring them and a few haters who will never bring them. The rest of us tend to shift back and forth mostly based on what the rest of the meta looks like. As it stands, the FD Cannon is currently pretty popular. It is one of the cheapest ways for Rebels to get Impact and has a pretty solid stat line all around.
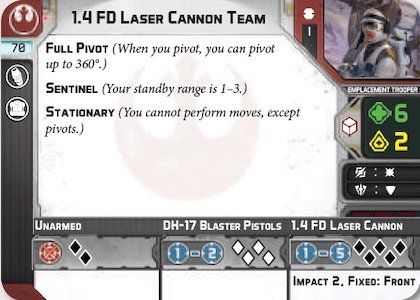
- 65 Ponts
- 6 HP + Courage 2
- White Defense Dice
- Surge Block and Hit
- Emplacement Trooper
Full Pivot - While Pivoting is not super common or necessary if you place these guys well, having the option to pivot up to 360 degrees can be super clutch. This allows you to potentially threaten almost anywhere on the table should you need to.
Sentinel - Absolutely huge. Sentinel is the FD's bread and butter. It is fantastic for zoning out certain areas of the table. If you can get one or two FDs and maybe one or two Mk2s to build a range three standby castle you're doing good. It's a particularly good way to cover middle objectives and to cover your army from aggro melee units.
Stationary - This is the big one. Stationary is probably the only thing that keeps most people from using FDs more often. It has the potential to be a huge hindrance but with practice can be handled pretty effectively. However, no amount of practice will make it good, it can only really be neutral. Stationary is one of the hardest keywords to figure out in my opinion and it also makes your list very table-dependent. Bidding for Red is not a bad consideration just to make sure you can place your FDs in a good spot.

Weapons
The FD has three offensive weapon options. One melee and two ranged. The most important one is the self-titled 1.4 FD Laser Cannon. It throws 5 black dice with Impact 2 and fixed front at range FIVE. Being able to threaten range five shots with up to seven dice that surge is incredible. Fixed Front is not really a huge issue since you do have access to Full Pivot, and by the time you get out to range five, your arc is like three feet wide. If the FD only had access to even range four, I don't think it would see much play, but luckily that is not the case.
The FD team also has access to a range three, four white attack dice shot. This weapon can be useful in a pinch, but I would not rely on it to do much. It's more or less there for hail mary shots that will win or lose the game for you. There might be one scenario where I would advocate for its use. If you need to keep the big gun pointed towards a certain firing lane but you're getting flanked, then you can aim and shoot with this gun to try for some damage. Its melee attack is fine, 2 black dice won't do much, but by the time you're in melee, it's likely not going to end well anyway.
This is something I will cover a little bit later but it calls back to the title picture. The most effective FD Cannon is one that doesn't attack over an entire game.
Upgrade Slots
The FD Cannon only has access to two different kinds of upgrades. Comms and Generator. Usually, you will only see the Generator filled, but there are one or two comms upgrades that I'll point out here.
Emergency Transponder is an upgrade that I think can effectively go on any unit with the proper slot. It's extremely versatile and pretty cheap. The main use I can see for it on an FD is to get an aim when you need to use an action to recover a generator, but it can also be good to remove a suppression if needed.
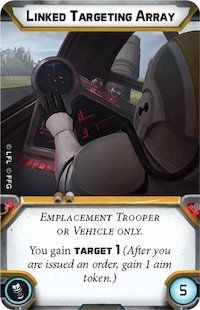
I've seen this, but never personally used it. If you think you will be ordering your FDs more than two or three times in a game, then this card is not a bad choice. One thing to consider here is that Rebel Veterans have Coordinate: Emplacement Trooper. That means when you order Vets you can coordinate to either a Mk2 or an FD Cannon should you want to. It's a little tidbit that I think a lot of people forget about.
As for the generators, you should almost always bring one. They both have a place in many lists It really depends on what the overall meta and your local meta look like. The FD's main gun alone, with no aims, averages 3.1 forced saves before cover or dodges. This is not bad, but usually not enough to get meaningful damage through cover. Generators can help that.
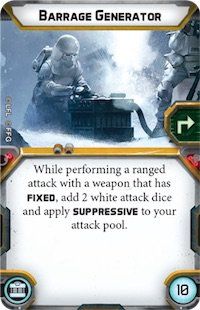
The Barrage Generator is my personal go-to. I like that it allows the FD to flex between anti-armor and anti-trooper. Two additional white dice bring the no-aim average up to 3.8 and the single-aim average to 4.9 forced saves. This is a pretty solid spot to be in and, if you're lucky, you can roll 7 Crits with suppressive. Suppressive attacks can be huge for a few reasons. Slapping two suppression on a Courage one trooper unit can put a real wrench in your opponent's plans. Do this with two FDs or even one FD and one other unit and the target will almost certainly be suppressed or even panic. This can be nice for limiting shots back at you or for controlling the objective. For three points, there's almost no reason not to bring this card. Unless...
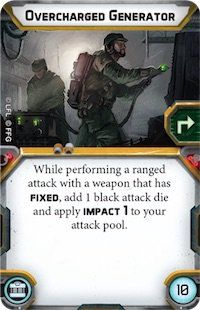
...You need more Impact. The Overcharged Generator is still definitely worth considering over the Barrage if you feel like you need more anti-armor weaponry. It also gives you a slightly more reliable die, but lower damage ceiling. Your no-aim average is 3.7 and one aim gets you to 4.7. This generator is the same amount of points so I can personally see an argument for either depending on what you're looking for.
Tactics
The FD Cannon is one of the most difficult and least forgiving pieces to use in the Rebel Library. If you do not place it properly you are potentially just wasting 68 points worth of your army. Learning where and how to place FDs is a trial by fire and one that every person who uses them has to go through. Some of us are lucky enough to have a local who uses them to good effect and can learn from them. There are a few things to remember when it comes to FDs.
- The Worst FD is one that fires no shots over an entire game.
- The Best FD is one that fires no shots over an entire game
- No, I will not elaborate.

Jk, I will. I know it's kind of a meme at this point, but there is some actual truth behind it.
It's a little bit backward to think about and even harder to properly figure out. Sometimes you fire no shots because you placed your FD in a terrible spot and sometimes you fire no shots because you placed your FD in the perfect spot. What I mean exactly is that if you can successfully zone your opponent out of an entire firing lane, you are doing a good job, even if you roll no dice. FDs can be scary, especially if you get an aim and a standby on them. Holding a firing lane is what they do best. Exploiting the objective is the easiest way to do this. Whether you're aiming at the middle of the map or sitting right next to the terrain your opponent's payload cart has to get to. There are many different uses for zoning, all of which can be extremely annoying to deal with as your opponent. This fact grows exponentially depending on how many FDs you have. I like two.
Another huge thing to consider with FDs and any mounted gun is Interlocking and Overlapping Fields of Fire.
Both are applicable here. FDs have the Fixed: Front keyword and therefore cannot shoot in a 360-degree arc. If you are able to cover a single firing lane with two FDs, the chances that your opponent will avoid it like the plague go up. It also allows you to utilize single FDs to cover less important flanks alone. Hopefully this visual helps you understand exactly what I'm talking about. It is almost certain death to run a unit into double or triple-covered Fields of Fire.
Another thing to consider when using and placing FDs is Enfilade vs Defilade.
"A formation or position is 'in enfilade' if weapon fire can be directed along its longest axis. A unit or position is 'in defilade' if it uses natural or artificial obstacles to shield or conceal itself from enfilade and hostile fire."
What this means in basic Legion terms is, that you want your FDs in cover, ideally high ground like a building or hill, and taking open shots at your opponent. When placing FDs, since they cannot move, a major thing to consider is what kind of terrain will be getting in your way if you need to shoot. If you can do this properly, your FDs will be in the nightmares of your opponents. Sitting in cover while threatening open shots is every gunline's dream.
Okay, last bit of real-world tactics here. This is applicable not to the FDs themselves but to what you pair with them. Flankers, Flankers, and more Flankers. There are numerous terms and ideas around this but the one that you might have seen in Legion discussion is about the Hammer and Anvil.

Your Anvil is FDs, Vets, Mk2s, and any other gunline and support units you have. Your Hammers are Din, Taun Tauns, Mandalorians, Boba, etc. Anything that can move quickly and efficiently while still threatening a decent amount of damage. Single or Double Envelopment works, depending on how many flankers you have, but Single is likely going to be more effective in Legion due to board size and how most objectives are placed.
Bonus points if your Gunline and FDs Fields of Fire are holding your opponent behind LOS blocking terrain (or in Defilade) while your flankers can move around to catch them in the open. This forces your opponent to choose either staying where they are and fighting the flankers or moving around the terrain and exposing themselves to the Gunline.
Lists
FDs can pair with literally anything in the Rebel Arsenal. I'll show you some options that I particularly like.
Here I will quickly talk about tailoring your battledeck for FDs. There are two pretty ideal Battlecards for you to include. Advanced Positions is the only thing in the game that can give FDs a move. During this deployment, they lose Stationary and gain Scout One. This allows you to do a few interesting things apart from moving to a potentially better position. Normally, FDs have essentially no hope of scoring on any objectives outside of maybe Intercept on certain deployments, but they can score on Key Positions if they use the Scout One move given to them. This can be really clutch and allow you to send the rest of your army elsewhere when normally you would be unable to.
Another card to consider is Rapid Reinforcements, though it is considerably more risky with Darktroopers, Wookies, and Ewoks around. This card essentially allows you to place your FDs almost anywhere on the table. This can be good for scoring objectives, holding firing lanes, or just getting them into the ideal position on the board. These days, it's a bit of a tough sell, but if your opponent has nothing that would benefit more, then I say go for it.
The only card I would suggest avoiding is Long March. Your FDs won't always be useless on this deployment, but it makes their positioning much harder to pull off.
Classic Hammer and Anvil
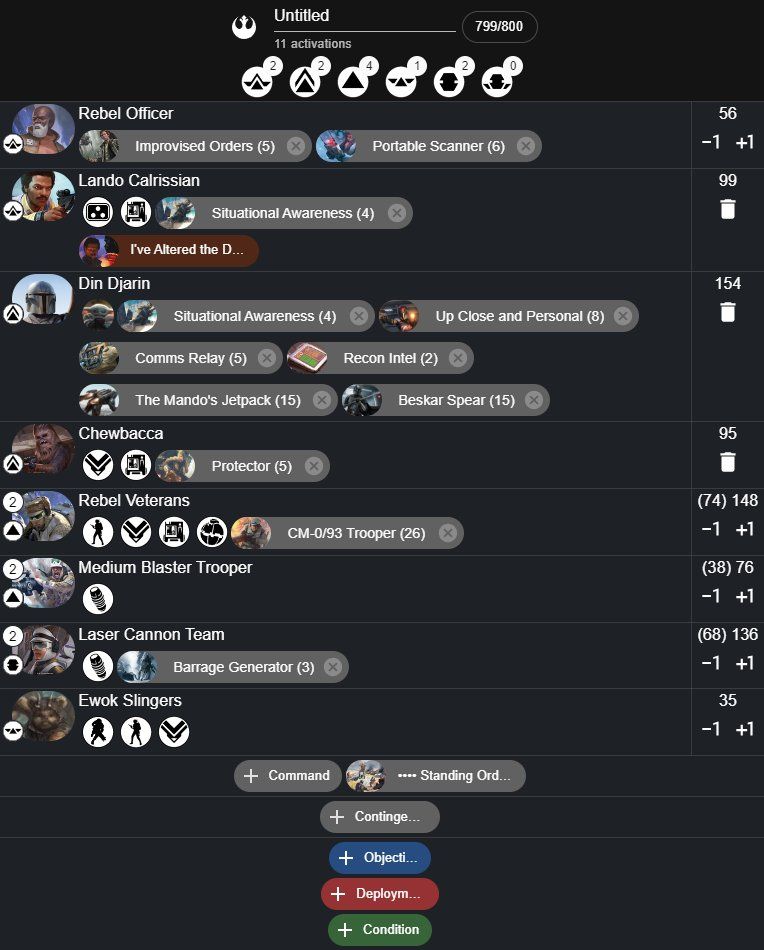
This list sort of exemplifies the meaning of the term Hammer and Anvil. Chewie, Officer, Vets, Mk2s, and Fds play Gunline. Slingers play flex/ dedicated objectives. Lando can also flex between support and aggression. Din plays Hammer.
Boba's Dream Team
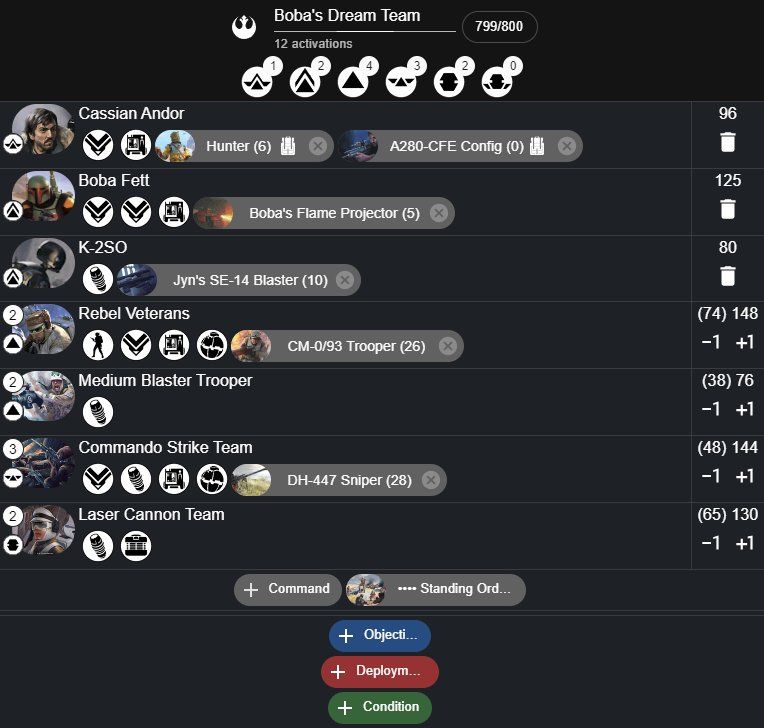
In 12 activations, six of them shoot at range five, and three shoot at range 4. This is the setup for the ultimate Rule with Respect turn. Potentially adding up to 9-11 additional black dice. After RWR, Boba, K2, and Cass can play aggro and harass while the rest of them sit back and gun.
Battle of Hoth
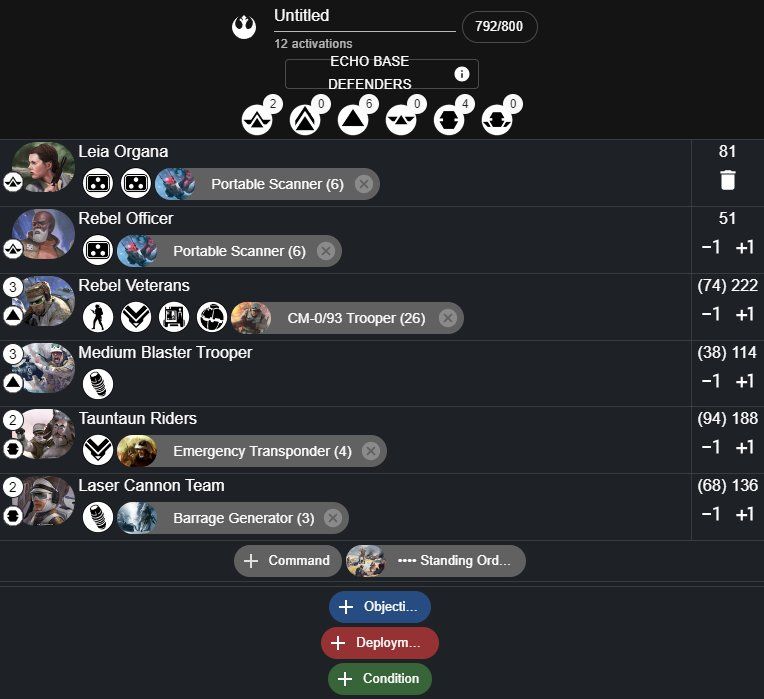
This is a very flexible list in building. I would not mind having Chewie. You can also sort around with the Support slot for one FD and three Tauns or all the way up to four FDs. The four FD list is a little bit of a meme, but it certainly holds down the map like no other list can.
I think that is all I have to say about the FD Cannon. I hope you enjoyed it and learned something about how to play them. Please let me know what you think and if you agree or disagree with anything I said.