B1 Battle Droids - Unit Guide

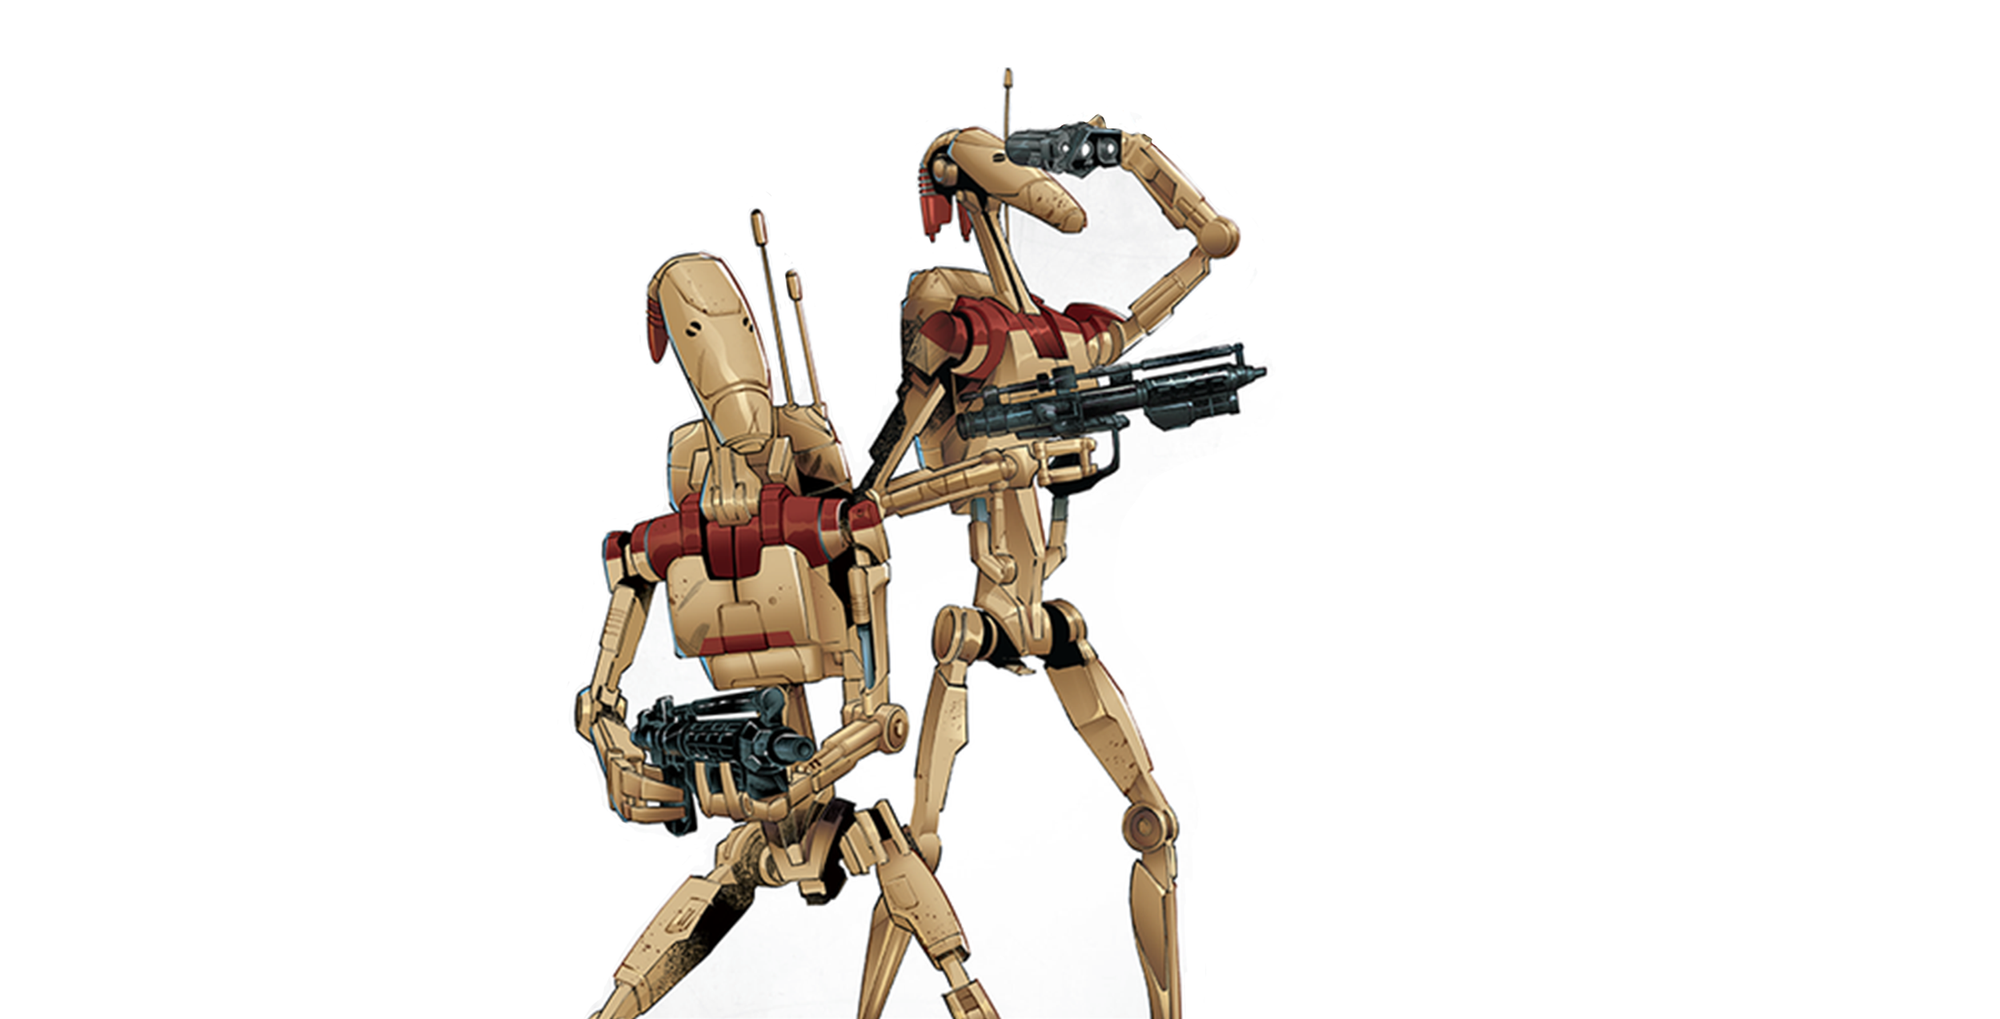
B1 Battle Droids were the rank-and-file troopers that fought for The Separatist Alliance during the Clone Wars. Though they may seem small and weak, they were formidable opponents for the Republic due to their sheer numbers and cheap price. B1s sometimes outnumbered Clones 100 to 1 on the battlefield.
In Shatterpoint, B1s are the most basic Droid Support. Their horde nature is represented by the fact that there are 3 B1s per base while clones have a single mini per base. They are one of the most used and flexible Supports in the game, specifically for Separatist lists. Let's see why.
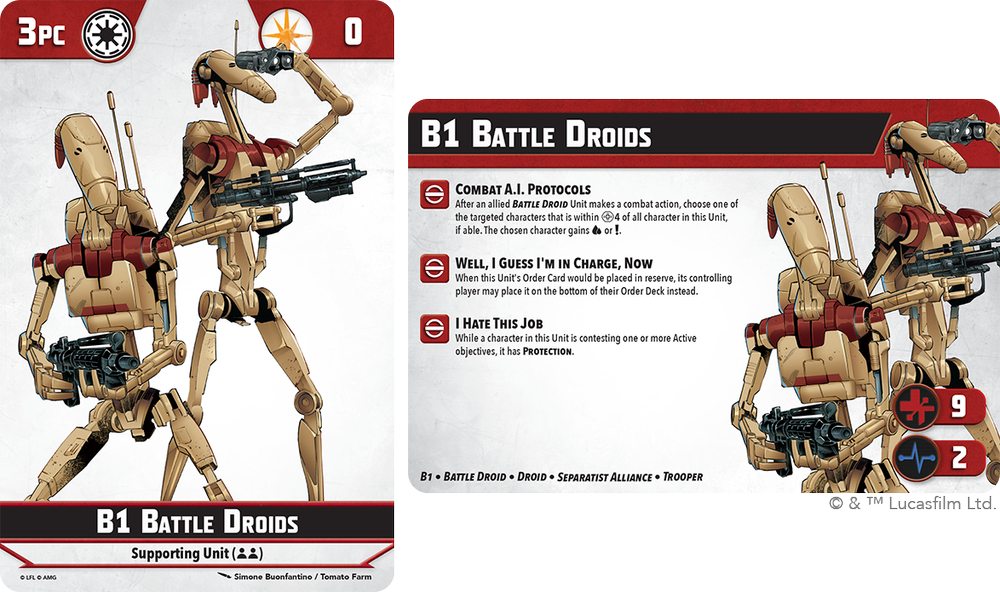
- 3 Points Cost
- 0 Force Points
- 9 Stamina/ 2 Durability
- Supporting Unit | B1 - Battle Droid - Separatist Alliance - Trooper
B1s are one of the cheapest options for list building. Three points is not as flexible of a spot as four is, but with the rise of nine squad point primaries and five point secondaries, they should see a rise in use. When you factor in the price of Kalani (who they're commonly paired with), three points is not a bad spot to be.
Nine stamina is actually a really healthy amount for a Supporting unit. That is two stamina more than most Clone supports and equal with a lot of Secondaries and a few Primaries. Of course, they only have 2 Durability so they last quite a bit shorter than 9 stamina Primaries. When you factor in their abilities and keywords, B1s can be a pretty tough little unit, that is until you get into melee with them.
They have a few very good tags at their disposal. B1 as a tag has not done anything yet, but I'm sure it will eventually. Separatist Alliance allows them to proc a few abilities and help other units proc a few abilities, but those are not as common as Battle Droid. Battle Droid is one of the best tags a unit can have. It is up there with Galactic Republic in terms of use and synergy. This tag allows them to benefit from three out of four abilities that Kalani hands out. Kalani is one of the best Secondaries in the game, especially for Droids. Grievous and Kraken can also do some things with this but slightly less efficiently.

Combat A.I. Protocols - This ability is wonderful. It is one of my favorites in the whole faction. Free abilities that hand out Strain and Expose are incredible for offensive output. This ability also procs off of themselves so you can set up a nice Expose shot for a later unit if you want to.
Well, I Guess I'm in Charge, Now - I think this ability might be their most important one. Droid lists are some of the most timing-reliant lists out there, and B1s are no exception. When paired with Kalani specifically, Droid Supports prefer to go after Kalani and if possible, as late as they can. Using this ability, you can guarantee that B1s will be last or second to last (because of reserve) activation in your deck. This means that the ideal scenario is your B1s are actually at the bottom or very top of your deck after a shuffle. Kalani Roger Roger -> Tactical Network -> B1s move -> B1s kill. It's an excellent way to get them into position before they go, which means you shouldn't have to worry about action economy as much with B1s.

I Hate This Job - This is the ability that I was referencing before. Protection is an incredible keyword to have, especially on a high-stamina Supporting unit. It requires them to be contesting an Active Objective, but that's the whole point of the game, so you should be doing that anyway. This ability is a good way to supplement their awful defenses, which we will talk about now.
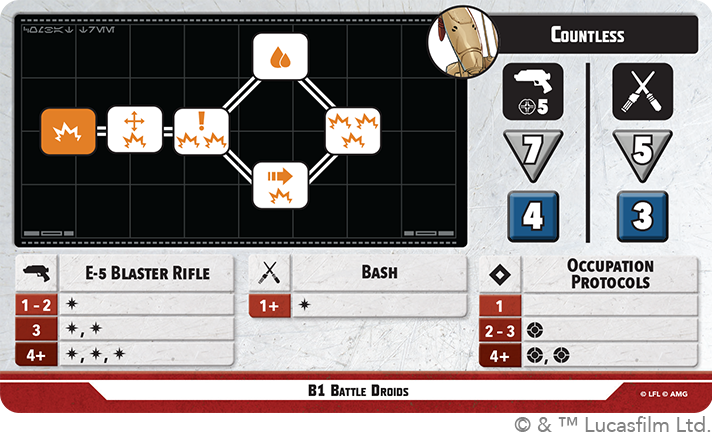
Countless

This stance is not bad. It's not great, but that should be expected from most rank-and-file Supporting Units. It can get a little bit of work done with some luck, but I would not rely on it to be spiking very often.
Seven attack dice at range five is a really solid start, but it goes kind of downhill from here. Five attack dice in melee is okay, but it's not going to be doing a whole lot once you look at their expertise. Their Ranged attack expertise is okay, but not good. No Crit Generation is really unfortunate, but they almost make up for it by getting a pretty large amount of Strikes. Their Melee attack expertise is straight-up bad. That's okay, look at it as a reminder that they do not want anything to do with engagement or melee fights.
The combat tree here is simple, yet effective. A three-point Support getting eight damage out of five successes is really good. A reposition in column two means they could be running around the table like mad, especially when you consider the five-dice attacks they get from Kalani and others. Exposing in Column Three is a nice way for your first character's attack to take down your opponent's defenses before the second character's attack. Add that Expose in with Combat A.I. Protocols and this expose is really just an extra damage. Nine potential damage is really quite good, albeit rare when you look at their consistency and expertise. I don't think you almost ever want to go Strain on column four, but it really depends on the game state. Most of the time a Shove and extra damage are just going to be better.
This stance may seem very good for a three-point support, but it is balanced out by how absolutely awful they are defensively. Four defense dice at range and three in melee is rough. It gets even rougher when you look at their defensive expertise and see that one rolled expertise does exactly nothing. I like how thematic this is, but it really does make it easy to put the hurt on them. They don't have a ton of Block generation when you go to higher levels either, and when you do the dice math they're almost never rolling more than one expertise anyway. This is all to say, be careful with how you play them.
Do not expect them to stay unwounded or even undefeated for more than a round or two. Use as many of their abilities as early and often as you can in order to get as much out of them as possible. I cannot say this next part enough: Avoid. Melee. At. All. Costs. They do not want anything to do with engagement, especially with Primaries or Secondaries. Hard stop.
Squad and Strike Team Ideas
Before I wrap up today's article, I am just going to cover a few different Squads and Strike Teams I have tried, I recommend trying, or I think could be good.
- Asajj Ventress
- Kalani
- B1 Droids
- General Grievous
- Kraken
- B2 Droids
This is the sort of "Oops All Droids" list I like the best. I think B1s play a pretty integral role here by being able to proc Combat AI Protocols on four out of 6 unit's attacks. They can also benefit from Kraken and Kalani quite a bit.
They have almost the exact same role in all other lists. Sit on objectives and hand out conditions as much and as fast as possible. The only other reason I would consider them is if you need a three-point support to make a list work, but Magnas are likely a better grab if you are not leaning full droid.
Overall, I think B1s are one of the best support units in the game so far. I think they have a good amount of utility and can slot into a bunch of different lists. Where they lack in defense they make up for in offense. I think if you're making a Separatist or Droid list they should be in it every single time. The more Battle Droid units we get, the better B1s will become.
Thanks for reading!