The Hangar: Delta-7 Aethersprite

Welcome to The Hangar, pilot! In this series we talk about starfighters, freighters, shuttles, racers, bombers, gunships, and everything else in between. This is the chance to look "under the hood," as it were, and explore what makes our favorite ships great.
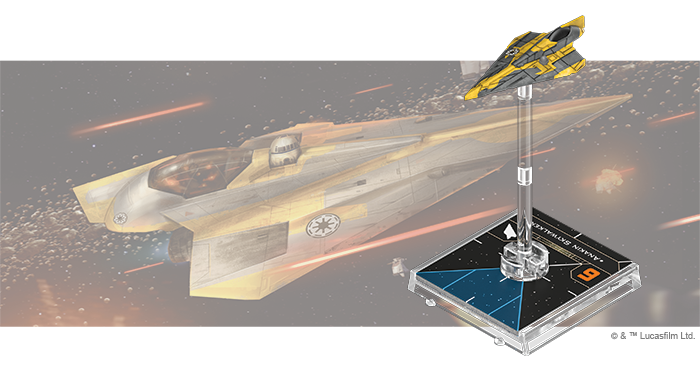
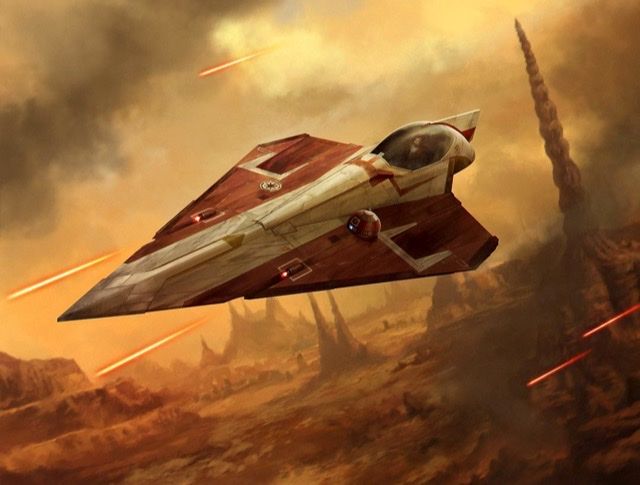
This week's subject in The Hangar and our first individual ship from the Galactic Republic is the Delta 7 Aethersprite or Jedi Starfighter! Best known for its appearance in Episode 2: Attack of the Clones as flown by Obi Wan Kenobi in pursuit of Jango Fett and by all of our Jedi friends in the Clone Wars series, the Delta 7 is an agile, adaptable fighter with a cadre of powerful Jedi pilots.
Overview
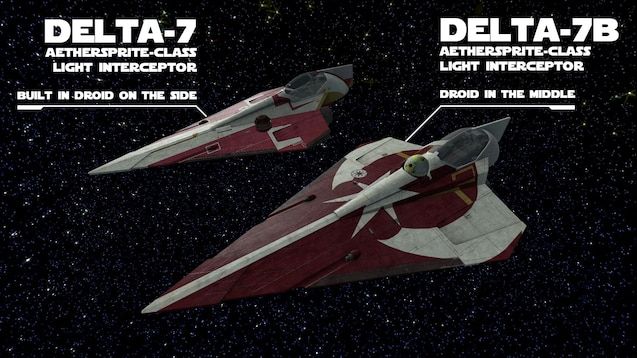
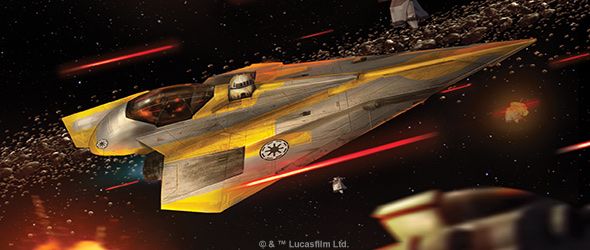
So, as of the early 2022 points and rules update, the Delta 7 chassis has been split into two separate ships. The first, the Delta 7 Aethersprite with Calibrated Laser Targeting, represents the early version of the ship as flown by Obi Wan Kenobi in Attack of the Clones. The second, the Delta 7B, is the improved variant flown later in the Clone Wars with a relocated astromech port and upgraded weapons and shields. You don't need to buy new miniatures to fly both ships! The difference is represented by cards and points costs.
Delta-7 - Calibrated Laser Targeting
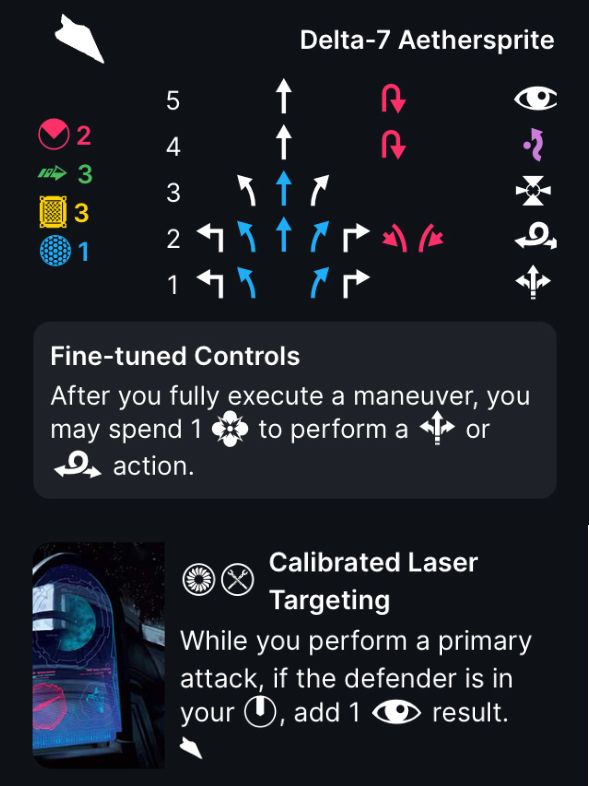
The early model Delta 7 is a pretty typical interceptor. Relatively light armament and armor afford speed and maneuverability. The combination of speedy forward maneuvers and multiple white hard turn options make the Delta-7 a formidable dogfighter with the ability to get in or out of the fight as you choose. The lack of blue hard turns is a shame, but either R4 Astromech or R4-P Astromech as well as several pilots' abilities can help address this minor deficiency.
This Jedi interceptor also has a trick up its sleeve! The Calibrated Laser Targeting configuration makes the ship's laser cannons more precise when the target is in your bullseye arc. Adding a focus result to your attack roll is pretty potent when all of this ship's pilots have Force charges available to convert it.
The action bar of the Delta-7 is relatively standard, giving you plenty of options. The ship's ability, customized for its Jedi pilots, is what makes the Aethersprite truly shine. The ability to spend a Force charge to perform a Boost or Barrel Roll action after completing a maneuver is very flexible and affords this ship the coveted "double reposition," or boost+roll combo in a single turn, that many players consider a hallmark of a true ace's fighter.
Delta-7B
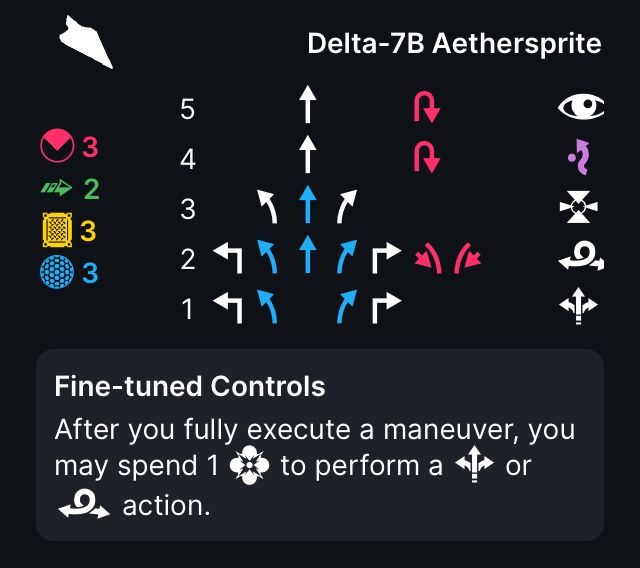
The Delta-7B is an uparmored and upgunned variant of the initial Delta-7, adding a 3rd red die to your attack pool for more consistent firepower and 2 shields to your defenses. Be aware, though, that the added weight of these built-in upgrades reduces your agility to 2. You'll often hear this fighter compared to a T-65 X-Wing, as it has the same basic stats and total hull+shield.
As long as you keep the aforementioned differences in stats in mind, the 7B is otherwise the same as the base model Delta-7. The dial, actions, and ability are the same. This is where the similarity to an X-Wing ends; show me an X-Wing that can take a reposition action to get out of arc and then end up with a green token to modify dice! Well, except for the great Kullbee Sperado, I mean.
Strategy and Tactics
Delta 7 - Calibrated Laser Targeting
As mentioned above, the Delta-7 is relatively lightly armed and armored so you're going to want to pick your engagements carefully. Sometimes it's a better idea to ditch your shot and try again from another angle if it looks like you're going to take too much return fire.
Use your Fine Tuned Controls to line up that bullseye as much as possible to increase the offensive power of this ship. Don't be afraid to spend a Force to boost or barrel roll and then use your action to Target Lock provided you still have Force left to modify that added focus result. Jedi in the Delta-7 like to work with clone wingmates that can carry offense-boosting upgrades like the classic Seventh Fleet Gunner. The trick here is that Calibrated Laser Targeting gets you around the 4-dice limit on 7FG because it is not an additional die but rather is an added result. The classic, ideal combo is this: your Obi Wan Kenobi rolls up to an enemy ship, uses Fine Tuned Controls to boost forward to get range 1 and the bullseye. Then you take a Focus or Target Lock as you prefer (if your 7FG carrier is a LAAT then its ability can provide two rerolls), then when you attack you spend the Seventh Fleet Gunner charge to roll an extra die. Let's add it up: that's 2 printed, +1 for range 1, +1 for 7FG (now up to 4, the max for 7FG), but WAIT! Now you add a focus result on top of that! With the right dice modifications and a bit of luck you can consistently lay down 5 hits from this little ship. Seems pretty good.
Delta 7B
The 7B's added shields help a bit with survivability but always remain conscious that the ability to take a few more hits is balanced by the downgrade to two agility, meaning that you'll probably end up needing those shields. I like to use the Delta 7B to get up close and personal, allowing the range 1 bonus to to improve its already potent offense to 4 red dice. Just be careful about how many incoming shots you'll be taking in a round and use Fine Tuned Controls to mitigate that risk. R2-D2 astromech is a helpful upgrade to recover a shield here and there to make up for any mistakes.
Because of its reduced agility and the fact that it is a potent threat and represents a lot of points, a Delta 7B will want to roll with a squadron that can enhance its survivability. I like to use clone pilots with Dedicated to allow my Jedi pilots to reroll blank green dice. Additionally, any way to reliably provide green tokens so that your 7B has them available for both offense and defense is helpful. Some good examples would be to fly with Shaak Ti in the Eta-2 Actis, allowing you to hold on to tokens from the previous turn, a LAAT, Gauntlet, or ARC-170 with crew that add the Coordinate action, and Yoda crew to immediately recharge any Force spent when using the purple evade action.
Pilots
The pilots for the Delta-7 come from two different sources: the Guardians of the Republic Squadron Pack and the Delta-7 Aethersprite Expansion. I'll put the source of the pilot next to their name. Also note that any of these pilots can fly either the Delta-7 with CLT or the Delta-7B, the difference is denoted by the configuration and points cost.
In my mind Jedi in the Delta-7, more than any other group of pilots, can vary in upgrade loadouts because the main draw is the pilot ability, the Delta-7 ship itself, and The Force. The way I build Jedi pilots varies a lot based on available slots, squad composition, and changes in Loadout Value so I think I'll try to stay away from recommending individual upgrades for the most part. Jedi are good, flavor to taste!
Jedi Knight (Expansion, Squadron Pack)
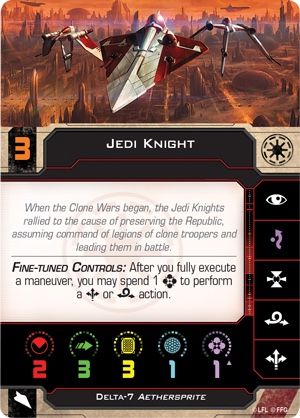
Not much to say about these guys except that they used to be an absolute menace and I'm not too upset that they aren't really around any more. There was a time when you could expect to roll up to a tournament and see 5 of these with Foresight or something similarly ugly and have to just prepare yourself for a bad time.
Barriss Offee (Expansion)
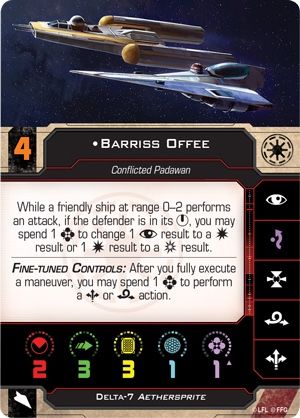
Barriss is often costed as a relatively inexpensive entry-level option to the Delta-7, and as she is a Padawan with access to only one Force charge this makes sense. Notably, many people often focus on the fact that she is a more efficient option than other pilots and forget that she has a pretty decent ability!
In order to preserve Barriss' Force for either Fine Tuned Controls or to use her ability to help double-modify a friend's shot, try to give her upgrades that modify her dice or pair her with ships that will grant her extra actions. Barriss is usually a solid choice for the points in either Delta-7 variant.
Ahsoka Tano (Expansion)
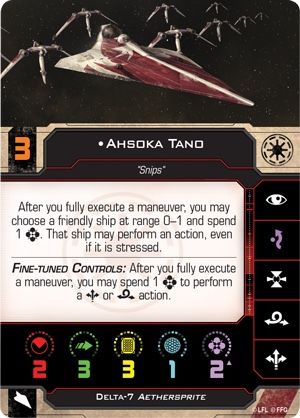
Ahsoka is an outstanding pilot in the Delta-7 and Delta-7B, especially if she is costed more economically than the "aces" like Anakin, Obi Wan, and Plo. Her ability to pseudo-coordinate another ship after she moves can be incredibly powerful, especially if that other ship is planning on doing a scenario action. Don't forget that, unlike her later Rebel version, this Ahsoka can use the ability on herself, though I would think you'd normally want to just hold on to the Force charges unless you did a red maneuver. The strength of her ability is somewhat tempered by her low initiative, so keep that in mind.
Luminara Unduli (Expansion)
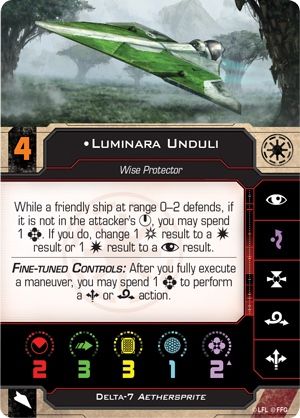
Luminara, Barriss' Jedi master, has the inverse of Barriss' ability. The extra Force afforded to Luminara is helpful in that you'll be more inclined to occasionally use her ability to help out a friend. Unfortunately, she is usually costed around the same as other options like Ahsoka and Mace who tend to be the better choices in most situations.
Mace Windu (Squadron Pack)
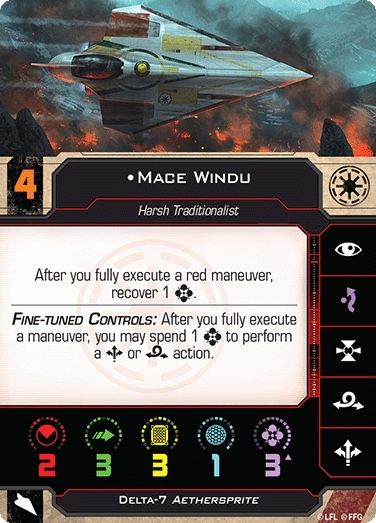
Mace Windu wants to fight and he's pretty good at it too. He usually hangs out in the second-tier of points cost and initiative with Ahsoka, Barriss, and Luminara because though he is an incredibly powerful Jedi he isn't quite the pilot that Plo, Obi Wan, and Anakin are. His 3 Force charges mean that, especially in the Delta-7B he can get up close and personal, take Target Locks to double modify his attack dice, maybe use a Force upgrade, then use a Koiogran Turn or Segnor's Loop to jump behind the enemy and regenerate an extra Force. Mace is one of my favorite pilots to upgrade to the Delta-7B because his ability encourages aggressive flying.
Plo Koon (Squadron Pack)
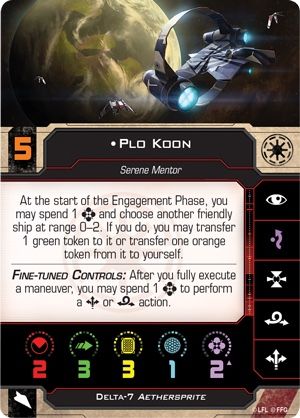
Plo's ability helps his buddies more than himself, in keeping with Plo's compassionate actions in the Clone Wars show. I'd say the only thing that keeps me from flying Plo more often is that for the points and as an Initiative 5 "Ace" I tend to expect a more offensive ability. That said, he has his uses. He can pass a Focus to a Z-95 to double mod a Proton Rocket shot or pull the Disarm token from an ARC that recharged Seventh Fleet Gunner.
I would generally take Obi Wan before Plo and, if I have both, would fly Plo as just an I5 ace with an ability that I can use if he happens to be out of the fight for a turn. His ability can be handy and there are certainly useful combos, but there are better ways to get someone an extra Focus token. With the prevalence of Jam tech it may be worth it to bring Plo to remove them but the timing, start of the Engagement Phase, means that your ship that was jammed probably already suffered from its effects. Patience is a useful upgrade on Plo since you'll often be using his ability to remove a Disarm or Jam token or pass away his Focus token and won't necessarily be shooting that round, so you can take the Deplete to regenerate extra Force.
Obi Wan Kenobi (Squadron Pack)
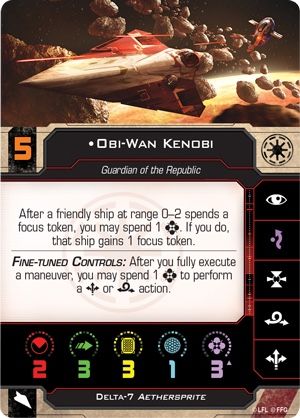
Obi Wan is our next wise, compassionate Jedi Master at initiative 5. His ability is pretty helpful, especially if you consider his healthy pool of Force charges. Sure, the friendly ship has to first spend a Focus token to get it back, but that means that your Anakin can take a shot at an enemy who is about to shoot back and have a Focus token for both attack and defense, or your LAAT with Ghost Company can spend a Focus on the first shot and get it back to take the double-tap, and the same goes for an ARC-170 with Veteran Tail Gunner. As is the case with many of these powerful Jedi the ability is helpful but you need to accept the fact that they are paying a cost (Force) to help someone other than themself.
Obi Wan also likes Patience to help recharge his large number of Force charges, but not as much as Plo because he can hang on to his tokens and still shoot after helping a squadmate retain theirs.
Anakin Skywalker (Expansion)
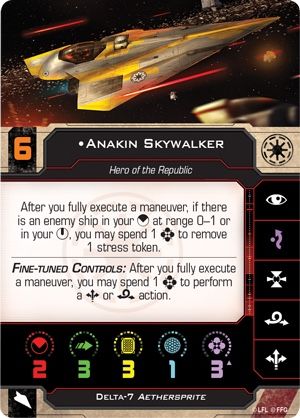
Here's Anakin, the Republic's best pilot and the only Initiative 6 pilot in the faction. He's pretty great in either the Delta-7 or 7B so if the points make sense then he'll work well in most lists. You'll want to find a way to protect the heavy points investment so R2-D2 is helpful to either regenerate shields or remove enemy bombs and mines.
Anakin's ability is useful in many situations, both simple and complex. At its most basic, you can perform a red maneuver to end up behind an enemy ship and, as long as they are at range 1 or in your bullseye, you can spend a Force to remove the stress and take an action. For a fun and thematic combo try pairing Anakin with Chancellor Palpatine/Darth Sidious on a LAAT/i. Sidious Coordinates while also granting a Focus token or regenerating a Force charge, but at the cost of stress. Anakin can then execute a white maneuver if needed and lose the stress with his ability.