Battle Deck Decisions - Objectives (Blue)


Building a Battledeck for Legion is one of the most brain-melting things to do. Each player must bring 4 Deployment, 4 Objective, and 4 Condition cards with every army. The Blue player is whose battle deck you use during a game. Players take turns voting on which cards to use for each game, only one of each type is used. Today I will talk about how to choose Objective Cards (Blue) for your Army.
If you are confused at any time with any of the wording, I have compiled some of the more pertinent ones here. For a deeper dive into the Core Rule Book, go here.
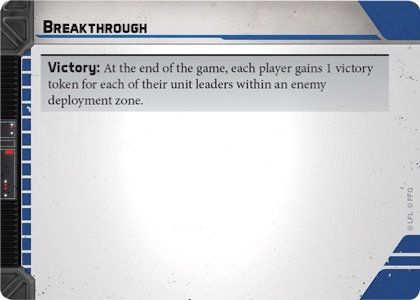
Breakthrough is the most straightforward of the objectives. It is extremely simple on paper but can get a little more nuanced in practice. You score 1 Victory Point (VP) for each Unit Leader (That includes Vehicles) that ends the game fully within your opponent's deployment zone(s). So that means just ignore each other and run straight for the other side of the board right? Wrong. ... Well, kinda wrong. Breakthrough is a game of knowing when and where to engage your opponent, if at all. If you have more activations than your opponent and you are confident you can score more than them, then you can safely avoid them the whole game. Stay far away and hidden, this will force them to come to you and potentially lose out on scoring opportunities. Where's the fun in that though?
Here's a video of The Fifth Trooper's Orkimedes (Kyle Dornbos) playing a perfect game of Breakthrough during LVO 2023. https://www.twitch.tv/videos/1722191716?filter=all&sort=time
Take notes, he wound up winning the whole tournament. What I really like to watch during that game is the way he pilots his bikes, you may notice he's very precise when it comes to engaging and disengaging with them in order to score and preserve activations. Knowing when to do so is the mark of a great player and a Breakthrough Savant.
Lists That Work Well:
- High activations are necessary. 10+ is a really good spot to be in, but I think you could have some success with 9 if you have particularly beefy units that can move and shoot the whole game.
- Mobile/Infiltrating lists are also fans of Breakthrough due to their, well, mobile nature. Infiltrating Halfway up the board allows you get to spend more time shooting, hiding, or moving in order to improve your score. Stuff like Taun Tauns or Speeder Bikes are fantastic for this objective.
Intercept the Transmissions is a personal favorite of mine. This one is also pretty straightforward. You place 3 objective tokens before deployment. 1 in the middle, and 1 on either side of the middle halfway between the center and short edges. At the end of rounds 2, 4, and end of the game you count who has the most trooper unit leaders (vehicles do not score) at range 1 of each objective token and they gain 1 VP for each token they "control" unless it is round 6, then you receive 2 VPs for each token. This is an objective that pretty much any list can play and be successful with. I believe it favors closer ranged/melee armies due to the up-close scoring nature but gun lines can still win. There are a few different ways to go about winning this objective and I'll break them down separately:
- Score Early. If you can Scout/Infiltrate units close to the tokens very early on you have a better chance of scoring on round 2. If you're able to, this allows you to dig in and play pure shooting while your opponent has to move and thus sacrifice offensive capabilities and/or cover. Be careful not to play too aggressively or you're liable to get wiped off the board by a dedicated gunline or force users.
- Score Late. This is specifically for gun lines and armies with good attrition. Sit back, and don't worry too much about scoring early. You can probably camp your own backfield token for the first couple of rounds. Shoot a lot and as effectively as possible and then at the end of the game, ideally, you should have destroyed enough of your opponent's army to move in and score the double-point tokens on turn 6 with ease.
- Ignore one token. This is where I will state a bit more opinion. I dislike aiming to score on all 3 tokens. I feel as though it spreads out most armies too thin and you just end up losing all three areas of engagement. I tend to deploy heavily towards one side of the board and aim to score exclusively on the middle and my side's tokens. If my opponent spreads too thin then I can take advantage by being uncontested on those two tokens for the whole game resulting in an 8-4 KP win. If the opportunity should present itself to run and score on the third token then go for it, but not at the expense of your home tokens' defense.
- Spread out. On the other hand, you can attempt to spread out. If you're playing on a map that allows you to easily cap your back token with 1-2 units and send everyone else out then that allows you the flexibility to aim for all 3 tokens at once. This is best done, I've found, with force users and/or melee skew armies. A force user can shred and hold a token alone if you have to.
Now all of these may seem a little bit contradictory, but it really depends on what your army can do and what you are comfortable doing.
Lists That Work Well:
- Intercept can be taken with pretty much anything, as a matter of fact, I don't think I've gone to a game without it in my battledeck ever.
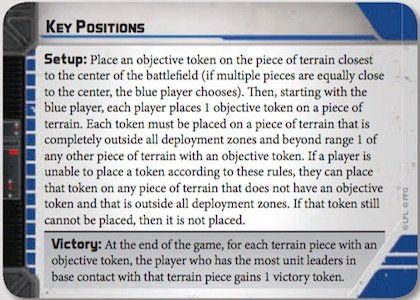
Key Positions (KP) is similar to Intercept in scoring. During set up players choose 3 pieces of terrain, 1 in the middle and then 2 outside of deployment zones and beyond range 1 of other pieces. Those become the Key Positions. At the end of the game whoever has the most unit leaders (including Vehicles) in base contact with each piece of terrain at the end of round 6 scores that piece. KP is a little different to intercept for 3 main reasons:
- Vehicles can Score on KP. This is one of the few objectives that non-trooper units are able to affect. If you're bringing vehicles I'd strongly suggest bringing KP in your battledeck.
- You score only at the end of the game. This is the biggest difference in my opinion. Mobile, scouting, and infiltrating units aren't particularly helpful here as they do with intercept. Play it slow, don't Leroy Jenkins your whole army just for them to get blown off the table and make you unable to score any objectives at the end of the game.
- You score by touching terrain, not by being at range 1 of it. This means that the scoring area of each token can vary wildly. You can choose something like 1 small crate or something as big as a building or crashed ship. There are benefits to both. The bigger the terrain the more unit leaders you can touch it, but also the more room for your opponent to sneak in.
Lists That Work Well:
- Pretty much anything. Vehicles especially like this. I would like to point out though that if your army is not able to withstand a full 6 turns of shooting and come out on the other end I wouldn't take this objective. You have to be able to stay alive with as many units as you can. As a Rebel player who doesn't field many vehicles, I don't particularly like playing KP.
- Empire and Republic Gunlines do enjoy KP greatly.
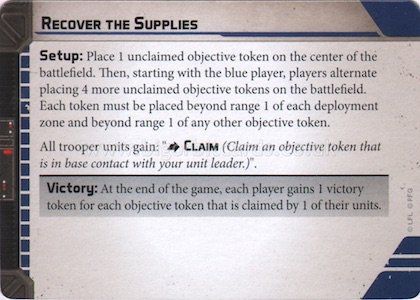
Recover the Supplies is one of my favorite objectives. I am a huge fan of objectives that force dynamic play. There's no real chance to just sit and shoot in a game of recover. Lots of movement and running around needs to be done in order to win. Players place 5 boxes around the map, 1 in the middle, and 4 spread around beyond range 1 of deployments and each other. When a unit trooper unit leader (not including Emplacements or Creatures) is in base contact the unit may perform the ->Claim action. At the end of the game, you get 1 point for each unit that has a claimed box, and the person with the most boxes wins. There is no drop action so the only way to lose a box is to get killed.
This objective is really fun and games can either go pretty normally or get really funky depending on how you play them. One of the benefits of this objective is that you are able to spread your army out a little bit more and attempt to threaten all 5 boxes at once. Normally, I would suggest sticking with your 2 and the center box, but it is possible and not too difficult to grab your opponent's boxes if you're able to spare the resources. This objective also falls under the Mobile/Scout/Infiltrate column. You can infill right next to a box and move -> claim turn 1. You can no longer start the game in base contact with the box so this changes some plans, not that it was generally a great idea to be out in the open middle off the bat anyway. It is probably a better idea to push a bit of your army up to provide overlapping lanes of fire before sending out your box grabber. If you can, try to Last-First your box grabber so they can safely move in, claim, and move out without getting blasted too hard. It is also possible, like intercept, to play a little more gunliney and wear your opponent's forces down before moving in to grab boxes, that is if they don't run to Timbuktu first.
Lists That Work Well:
- Mobile. Scout. Infiltrate. I'm going to be saying that a lot. Things like Sabine, Jyn, Iden, Arc Troopers, or even Din Djarin. Stuff that can move in quickly and weather some shots before getting the hell out of there.
- Gunlines can work. Like I said above, play the game of attrition. Shoot and kill. Run and Grab.
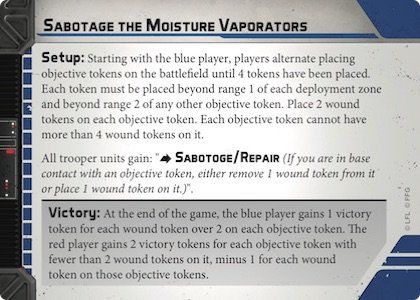
Sabotage is the opposite of Recover. Sabotage is an objective that promotes relatively static play. Hard-hitting gun lines really love this objective. You both set up by placing 2 Vaps each, beyond range 1 of deployments and each other. Each Vap starts with 2 wounds on it, the Blue player is trying to heal them to zero and the Red is trying to sabotage them to 4. You get VPs equal to the amount over or under 2 wounds that you put on the Vaps. That means if you're the blue player and there are two Vaps with zero wounds you will get 4 points.
It is really quite easy to sabotage/ repair your two home Vaps. Most lists that like this objective will stop there and just play a game of attrition, trying to win on kill points. You can attempt to play the objective and go for your opponent's Vaps but 90% of the time this requires overextending your forces and feeding your opponent easy kills. If your list can't win the gunfight then I wouldn't suggest this objective, that said: Stuff that can move fast and is durable can move in and score on your opponent's Vap's late game to sway the objective. I've had a game or two where some Jedi comes wandering into my lines and is able to score a Vap very late in the game.
Lists That Work Well:
- Gun lines. That's about it. High firepower gun lines.
- There is an argument to be made for really fast durable armies like Mandalorians, Arcs, or even Wookiees who want to be moving close anyway.
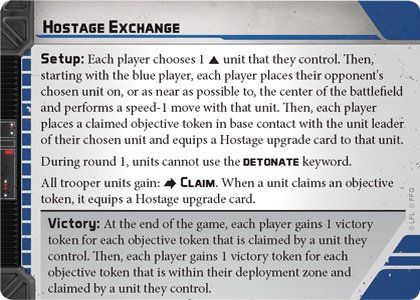
Hostage Exchange is one of the most complicated objectives. Each player starts with a corps unit in the middle of the board with a claimed hostage token. The objective is to end the game with one or both hostage tokens claimed. You receive one point for each token you have claimed and one additional point for each of those tokens that are in your deployment zone.
Hostage is one of the Objectives I would strongly suggest practicing before ever trying to play it at any sort of tournament. Most other objectives are self-explanatory enough that you can play them for your first time at a tourney, but not Hostage. There is a lot going on in games of hostage and if your opponent has a Force user and you don't? Good luck. Hostage lends itself extremely well to Force user play by allowing stronger force push and force choke targets and by promoting fast-paced close-range play.
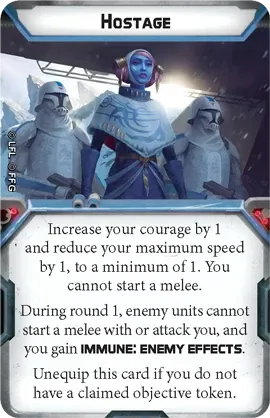
This is the Hostage token card. Units with the token claimed, gain the effects of this card until the end of the game or they die. There are some pretty important effects on this card to go over.
- Increase your courage by 1: This really makes sure that you are able to move twice a turn if you have the hostage equipped. You should be trying to run away as best you can with your hostage carriers. There is almost never a reason to do anything but run.
- Reduce your speed by 1 to a maximum of 1: This is also another reason you should be moving as much as you can, you're very slow. Most of the time, you will be safe-ish once you're in your own lines, but until then your hostage unit is liable to get killed.
- You cannot start a Melee: Pretty self-explanatory. You can't. Others can. This does not stop a band of wookiees or a Jedi from starting melee with you.
- During Round 1, enemy units cannot start a melee with you or attack you, and you gain IMMUNE: ENEMY EFFECTS: Yeah so this is also pretty easy to understand. It disallows your opponent from messing with your hostage carrier. You get one free turn of running, use it well. Immune enemy effects are also a huge part of it, which means no force powers, no command card shenanigans, and no Amban. This ends after the first round though, so be careful.
Lists That Work Well:
- Jedi. Jedi. Jedi. They really shine on hostage exchanges. Hostage is where I really learned how to play around with force push properly. If you're able to dive Luke into your opponent's carrier you're about to be in a very good way. Force users with access to choke are particularly effective because you're able to target the unit leader. If you choke the leader the whole unit drops the hostage token both opening up your chance to claim and forcing your opponent to waste even more actions on claiming.
- Scout. Surprisingly, Rex lists make for decent hostage lists. Since he is able to share his scout value after he is deployed he can allow your hostage carrier to perform a scout move. Normally Hostage carriers do not perform scouts since they are not "Deployed" and instead "Placed", so this gives you an easy leg up off the bat.
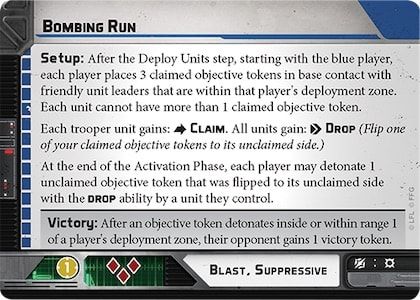
Bombing Run is also a contender for top fun and potentially high competitive value. After deploying both you and your opponent choose 3 units that are fully within your deployment zone, each of those units gains a bomb. Any unit may drop the bomb at any time during their activation as a free action. At the end of the round, you may choose to detonate one of the bombs you dropped. Your objective is to drop and detonate bombs inside or within range 1 of your opponent's deployment zone. If you do, you gain a victory token.
The added bonus is that the bomb can do damage to you and your opponents, and it's nothing to scoff at either. 3 Red, Blast, Suppresive, and Surge: Critical. That is capable of putting some serious hurt on a lot of units. More important than doing damage is scoring. If you can do both. Great. If you can't do both, prioritize scoring. Also important to understand is the fact that after you've dropped your bomb(s) enemy trooper units can claim them before they explode, so be careful where you drop your bomb and make sure it can't get snatched up before exploding. I'd suggest going as late as you can with your bomb droppers so that there's less chance for your opponent to steal. I'd also highly recommend not dropping more than one bomb a turn unless you absolutely have to. If two of your bomb carriers are about to die? Drop two. Try to place them far away from your opponent if you can.
Lists That Work Well:
- Mobility and Speed. Taking 3 Speeder Bikes? 3 Taun Tauns? Sabine, Din, and Clan Wren? Take Bombing Run. As long as you have 3 units that can move easily and quickly across the board, I'd suggest bringing Bombing Run. You can score with slower units, it's just not as easy.
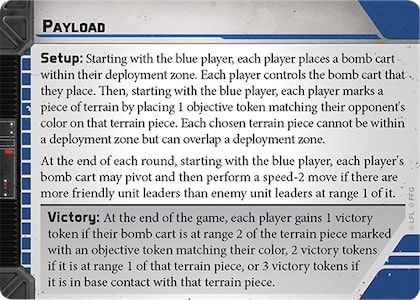
Payload is an absolute blast to play. A lot of payload games end up being very close-ranged and bloody and I love it. You play the game by both setting up bomb carts in your deployments zones and then choosing a piece of terrain for your opponent to get their cart to by the end of the game. The cart moves at the end of each turn if you have more unit leaders than your opponent at range 1 of your cart.
The cart used to have Hover: Infinite, but now it can only move over terrain that is its height or less. This causes some issues for you as the blue player. Since the red player gets to choose the table side, they can see payload being in your deck and choose a side that would be most beneficial, assuming you play it. Try your best as Blue Player to avoid putting your cart in a place where it will not be able to move toward your objective. If you cannot avoid such a thing, then your best choice is to completely ignore your cart and play a game of attrition. Screw the objective, win with the dice. Try to stall your opponent's cart for as long as you can. This is not too hard because at some point if you line it up right, your opponent's cart will most likely have to move through your lines. Sit, shoot, and wait.
Lists That Work Well:
- Close Range Lists. Use the mayhem to your advantage. Both armies will be pushing toward each other which makes your melee units very very happy. Jedi are also particularly good because of A. Melee. B. Force push can be used to push units out of scoring range. That goes for all objectives actually, USE FORCE PUSH IF YOU HAVE JEDI. It is the single most powerful card when it comes to objectives. It is one of the only ways to move and mess with your opponent's army directly.
Conclusion
I hope some of what I said was helpful to you, and that you feel a little bit better about how to choose cards for your battle deck. If you still feel like you don't know what you're doing that's okay, Neither do I. :)
Thanks for reading! Let me know what you think in the comments or shoot me a message!